Home
Home Pricing
 VPN Servers
 VPN Apps
 Help
HelpFlyVPN Android tutorial
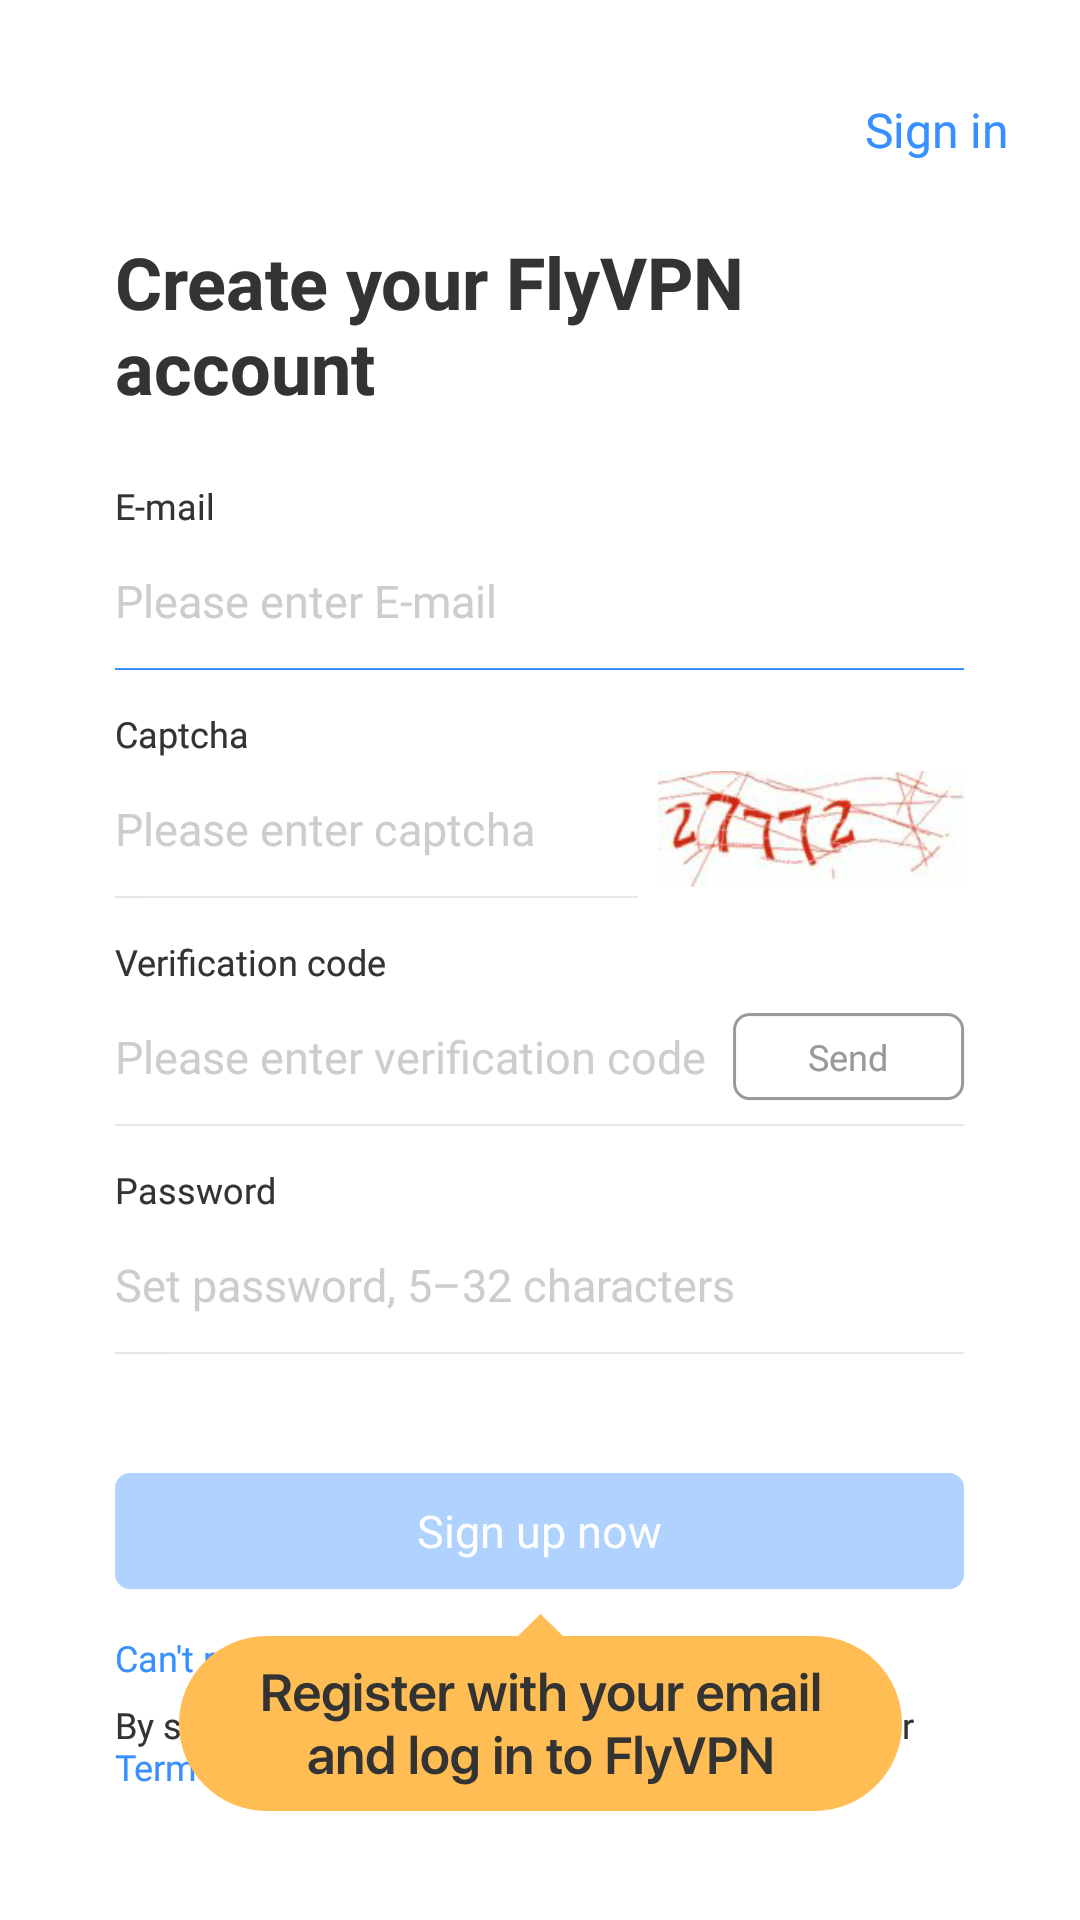
1. Open FlyVPN, register with your email and log in to FlyVPN.
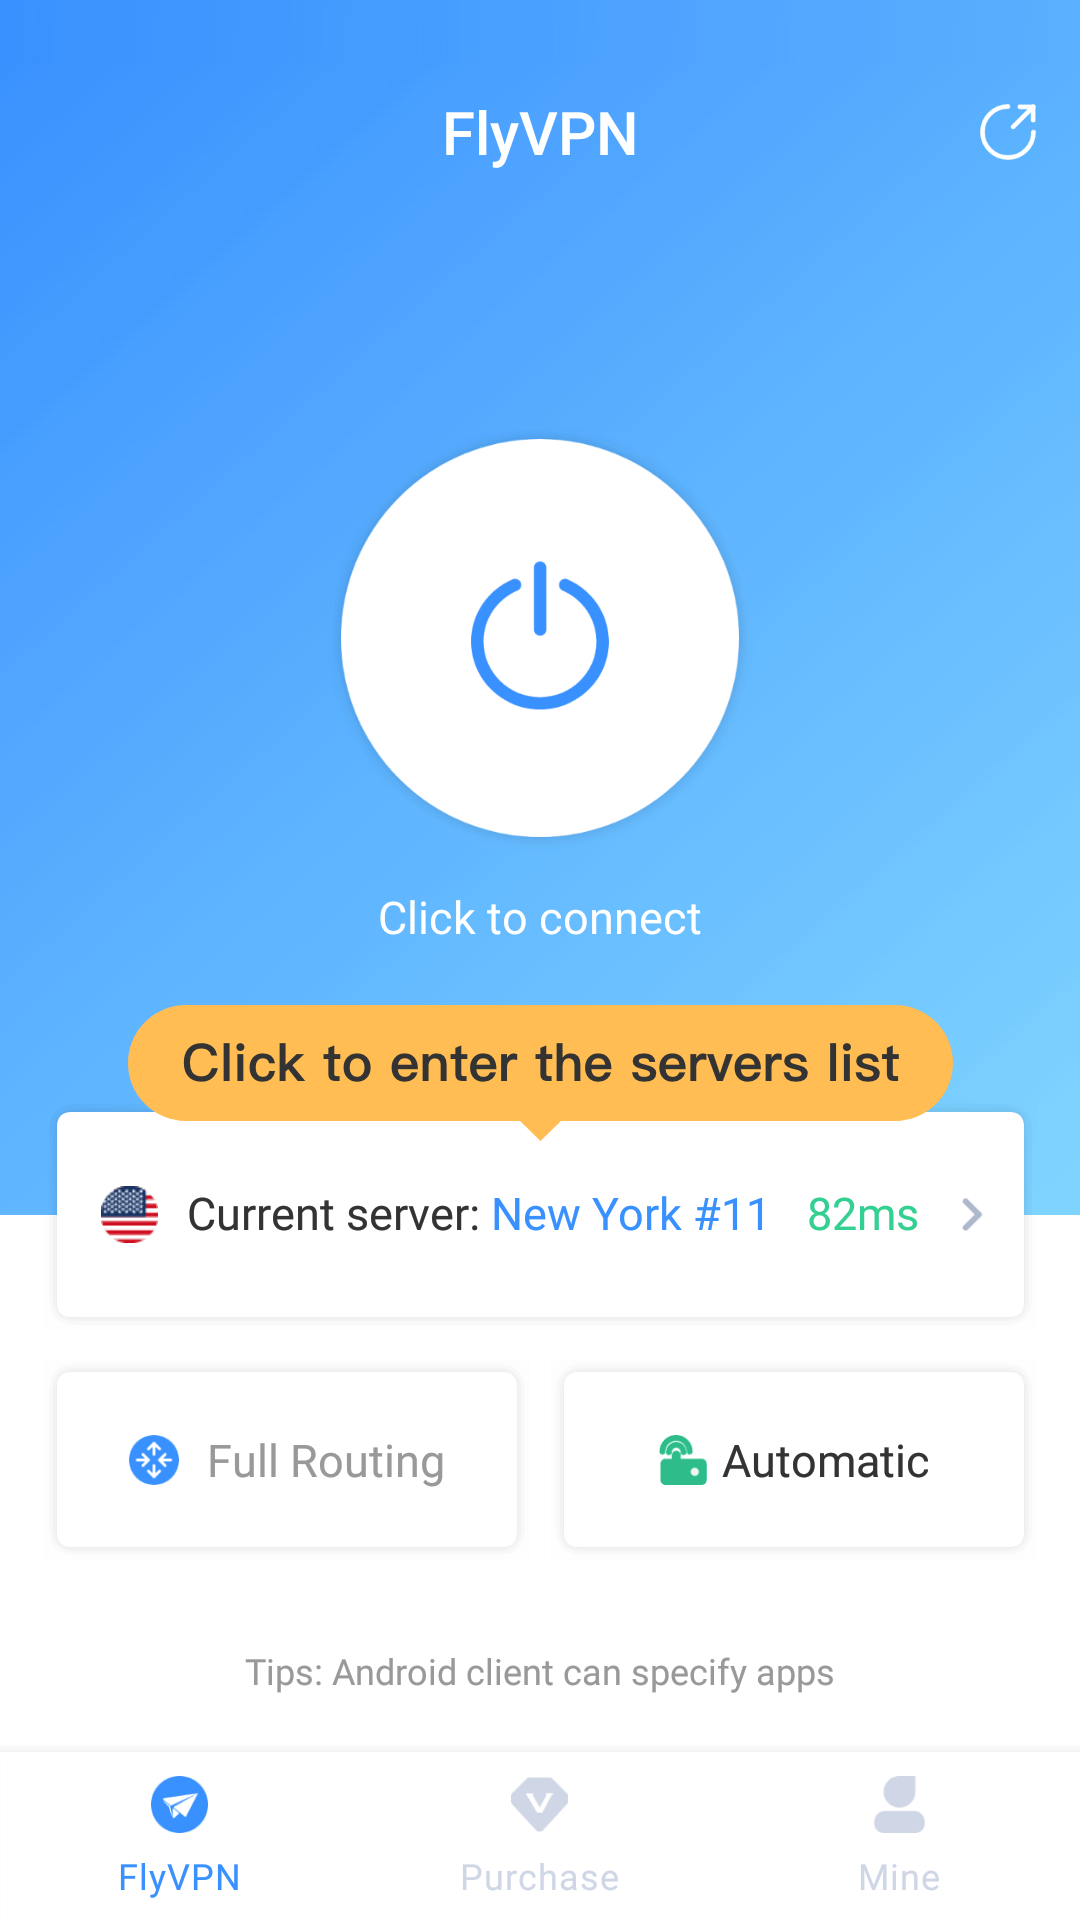
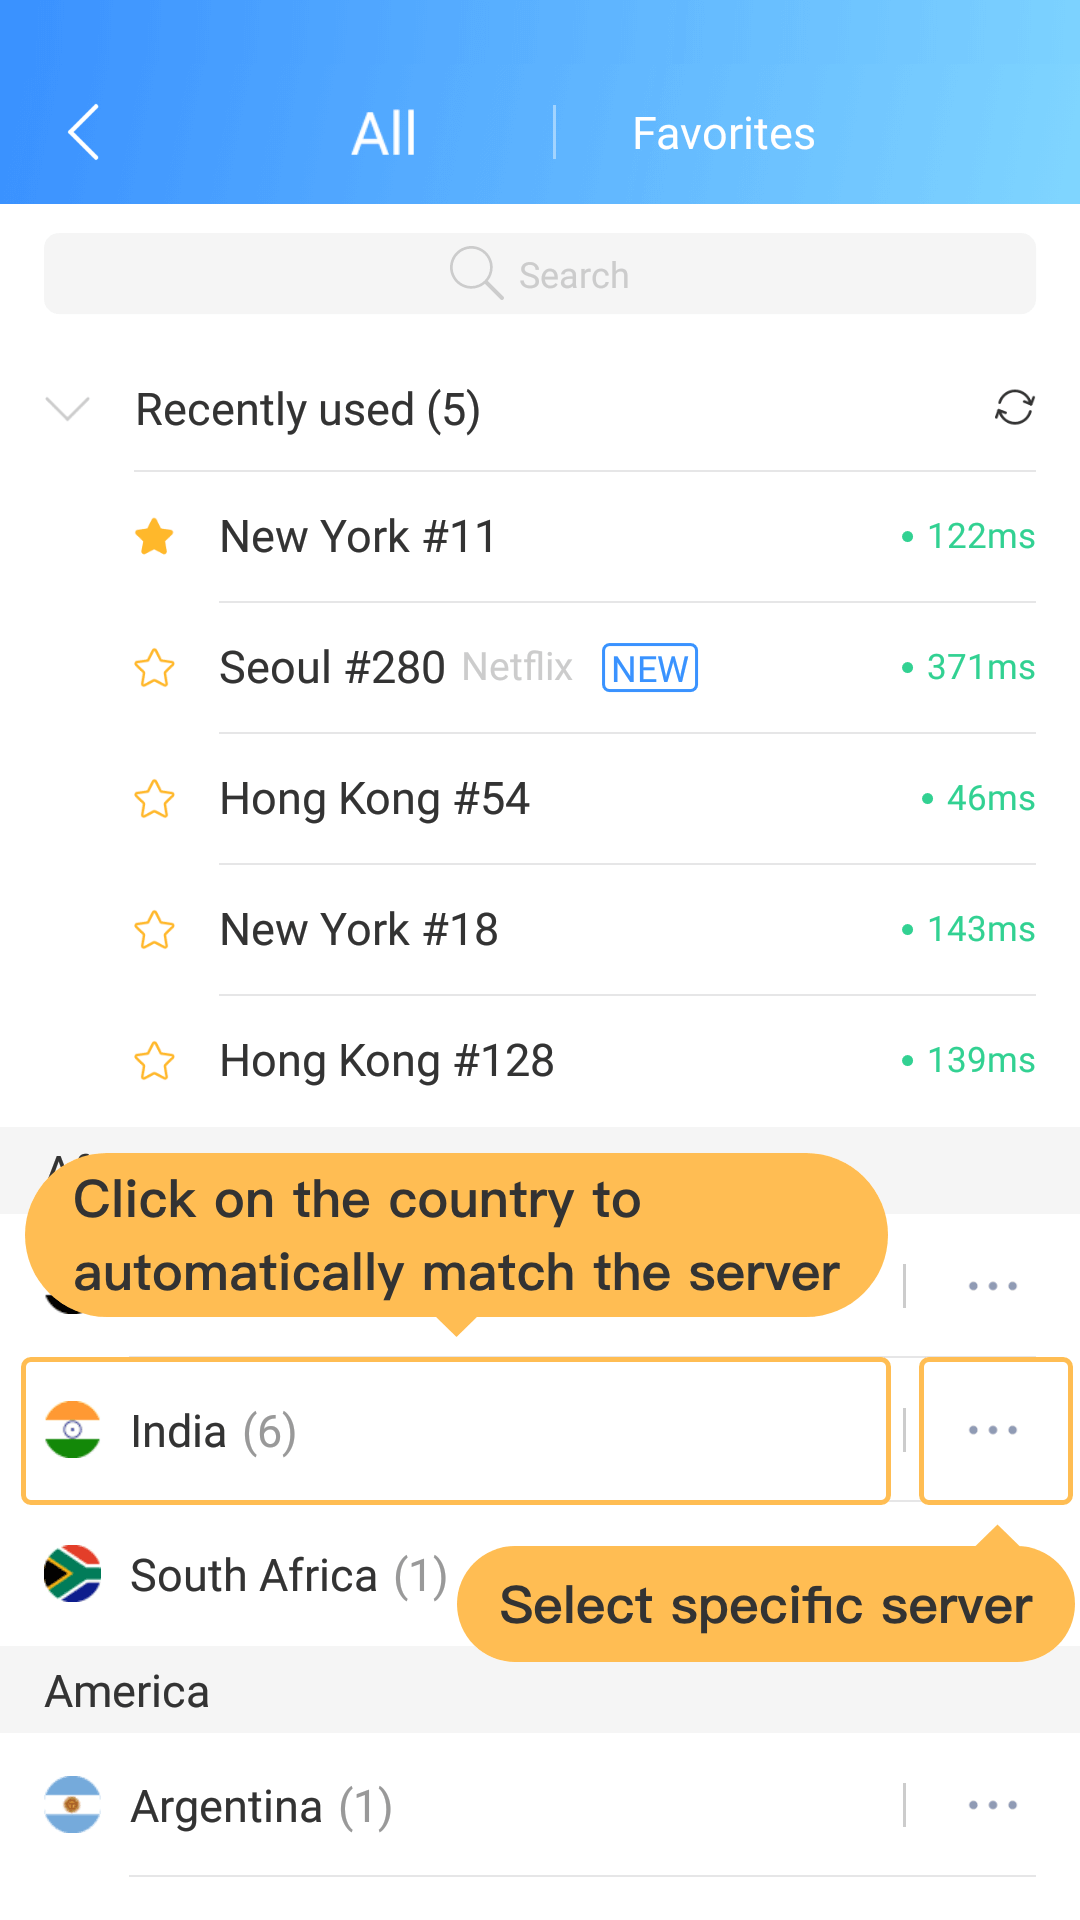
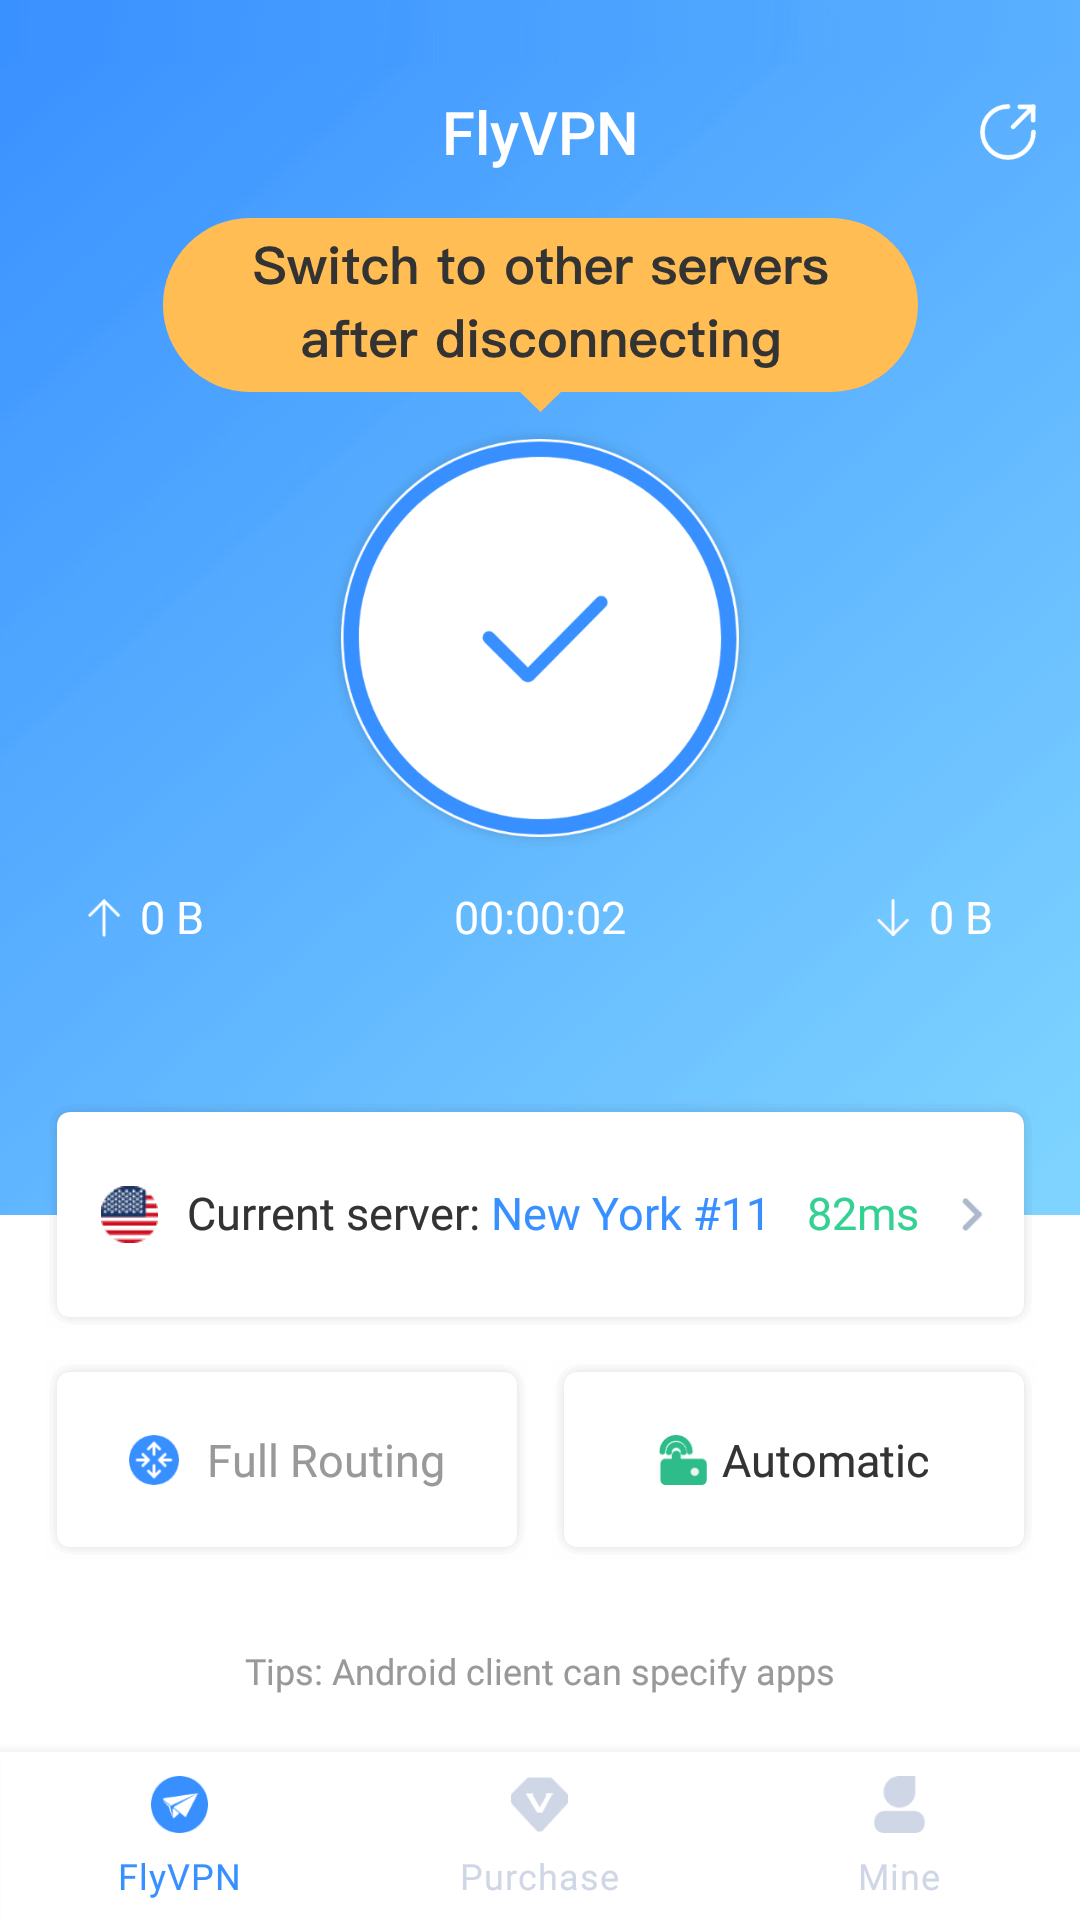
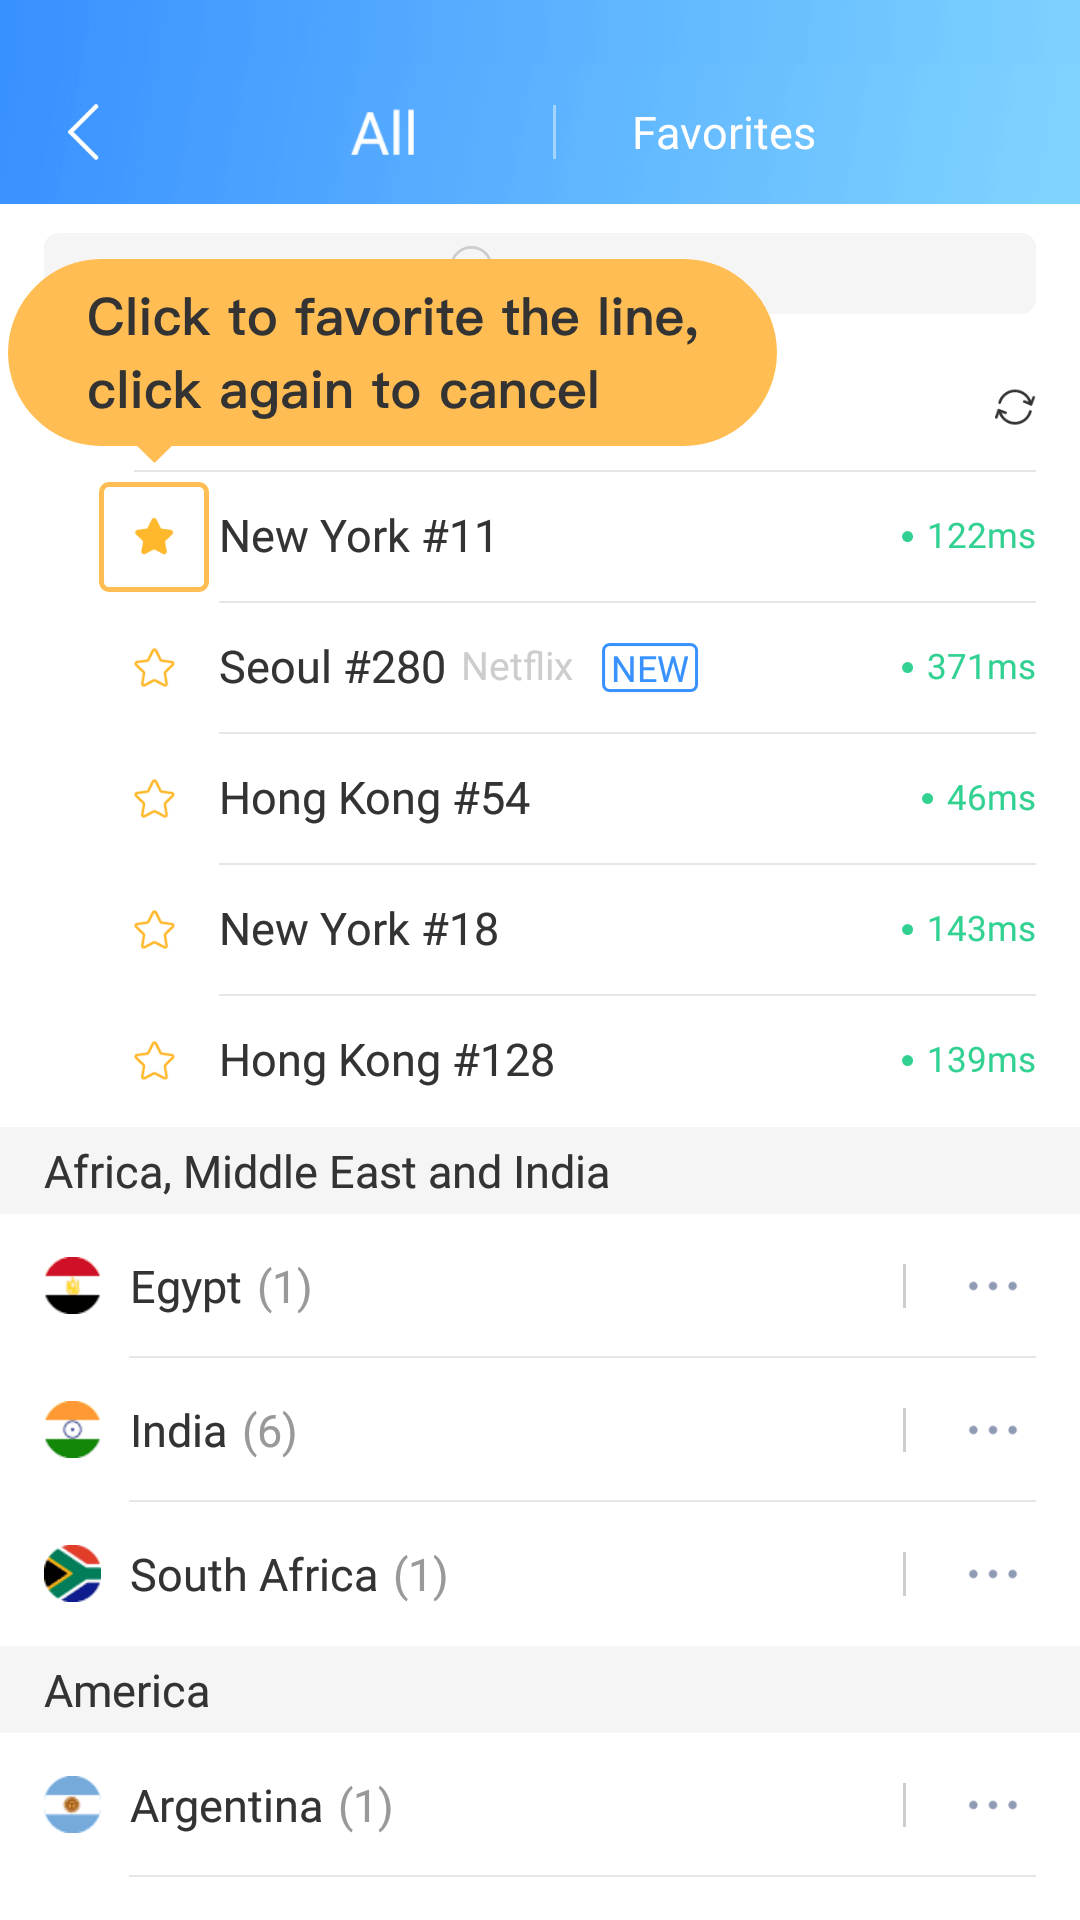
2. Click the Servers button on the homepage to enter the servers list, select a server, and click Connect. FlyVPN has the function of [Auto Match] which means that it will automatically select an appropriate server for you when clicking the country you need . If you need a specific server, please click the button on the right of the country to select the city you need.
3. If you have connected to a server, and you need change to another server, you can disconnect the currently connected server first, then enter the server list to select a server to connect.
4. The server list is divided into "All servers" and "Favorites". Click the star icon on the front of the server to favorite the server. Click it again to cancel the Favorite. The favorite server is saved in "Favorites".
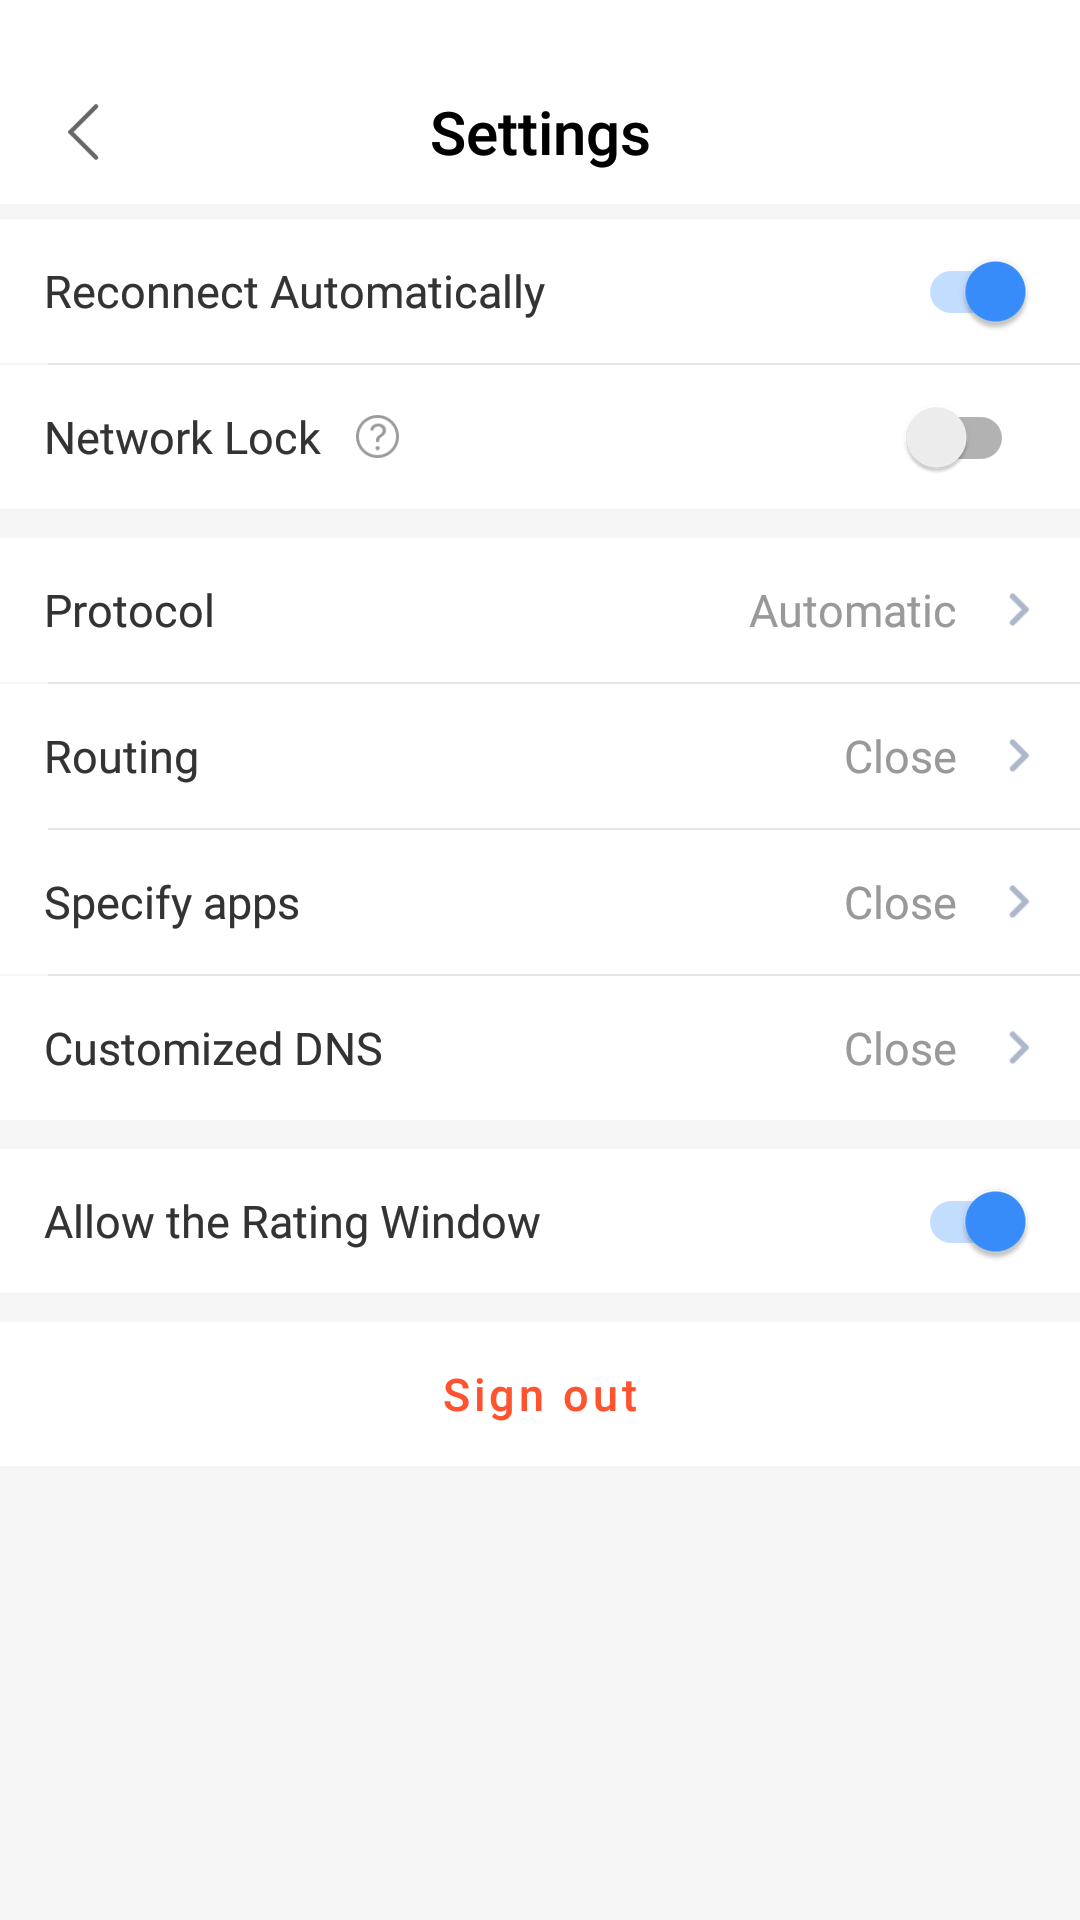
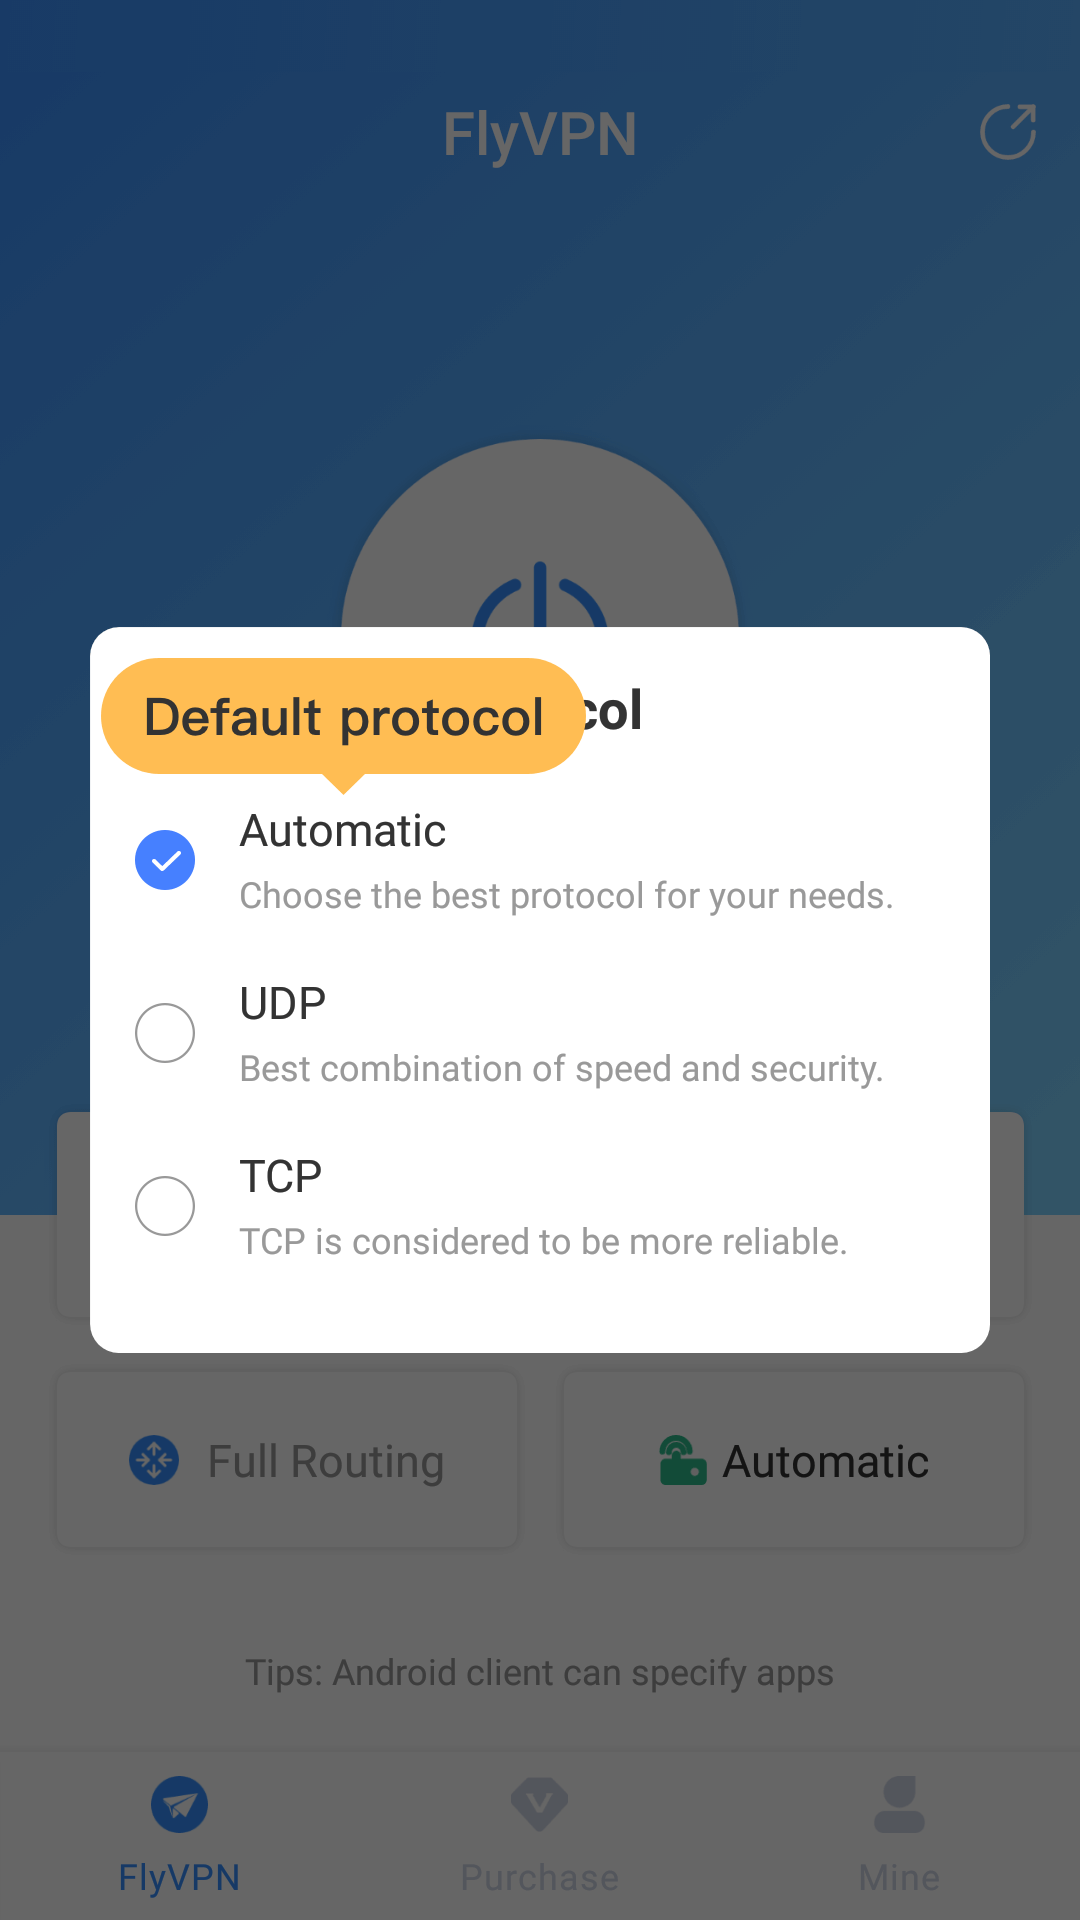
5. You can set the network protocol on the homepage, network protocols include: Auto, TCP, UDP. It is recommended to set the Auto protocol (default).
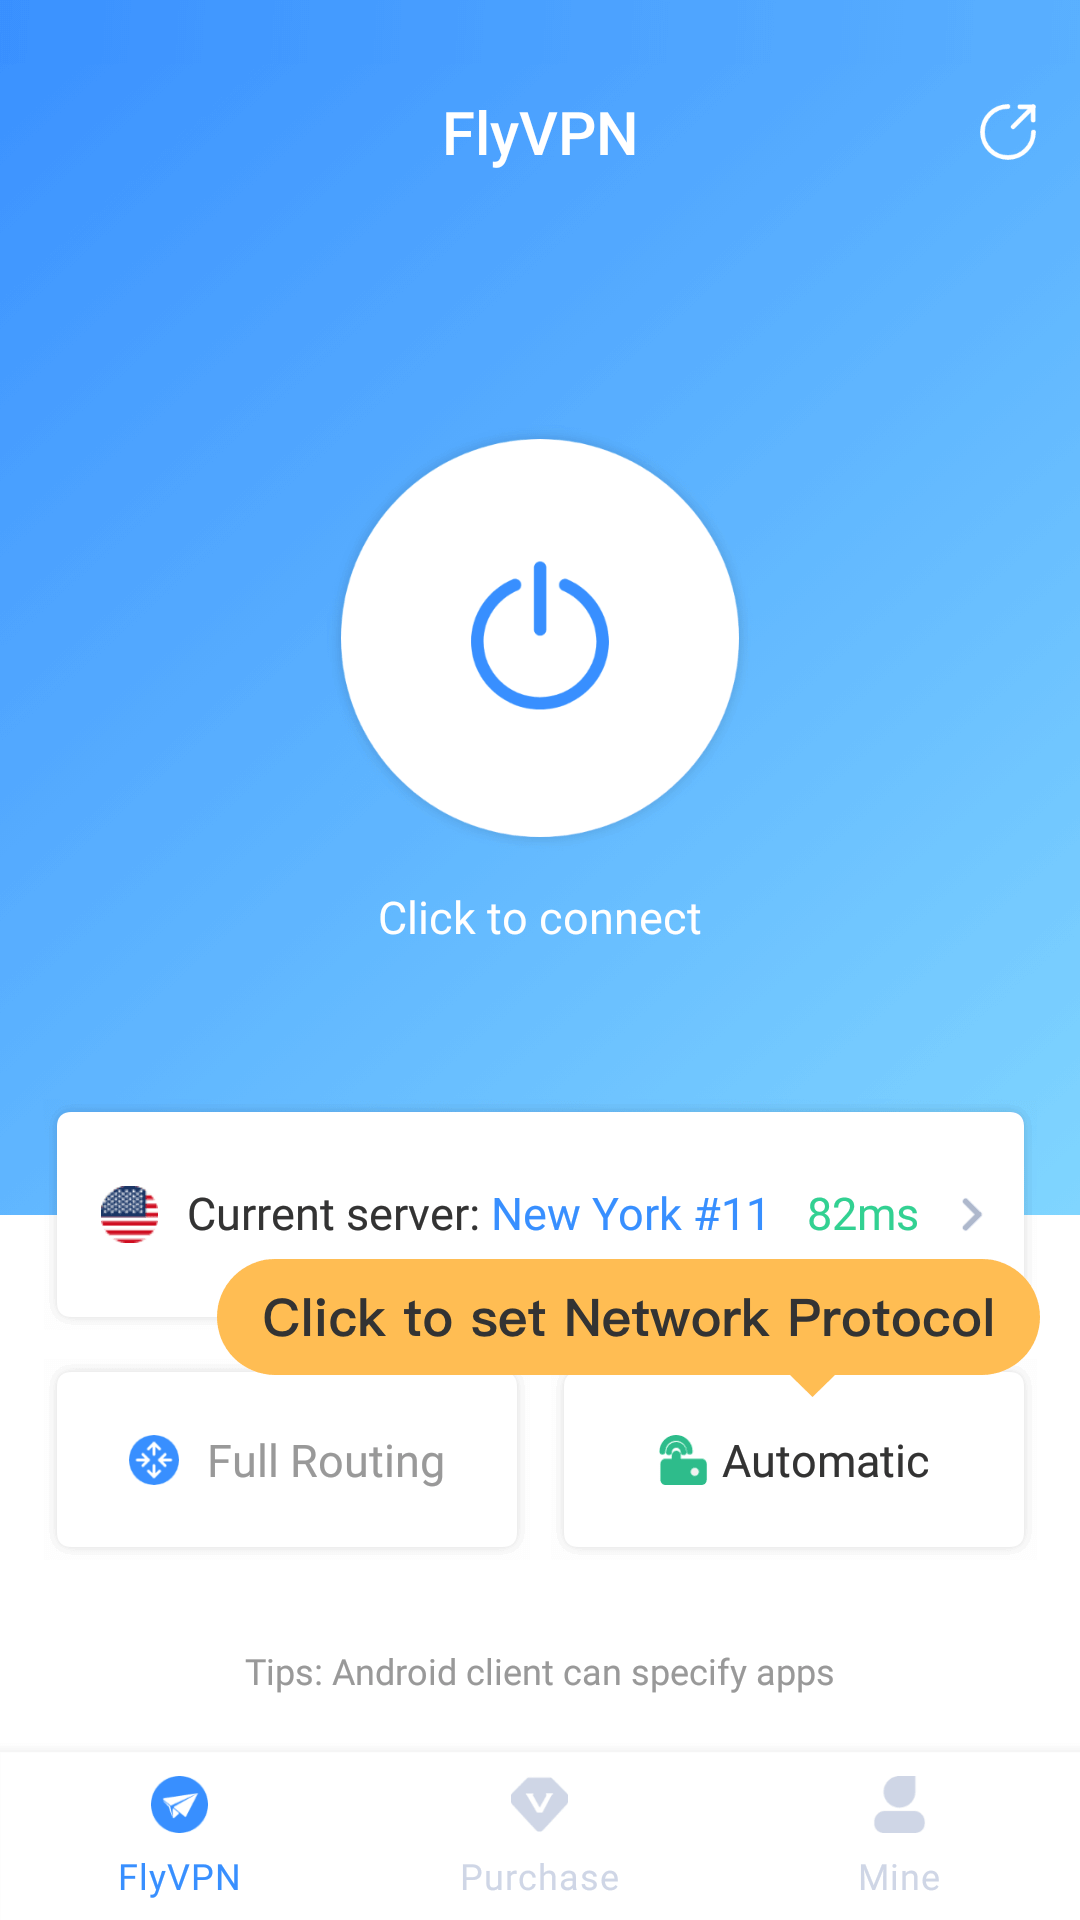
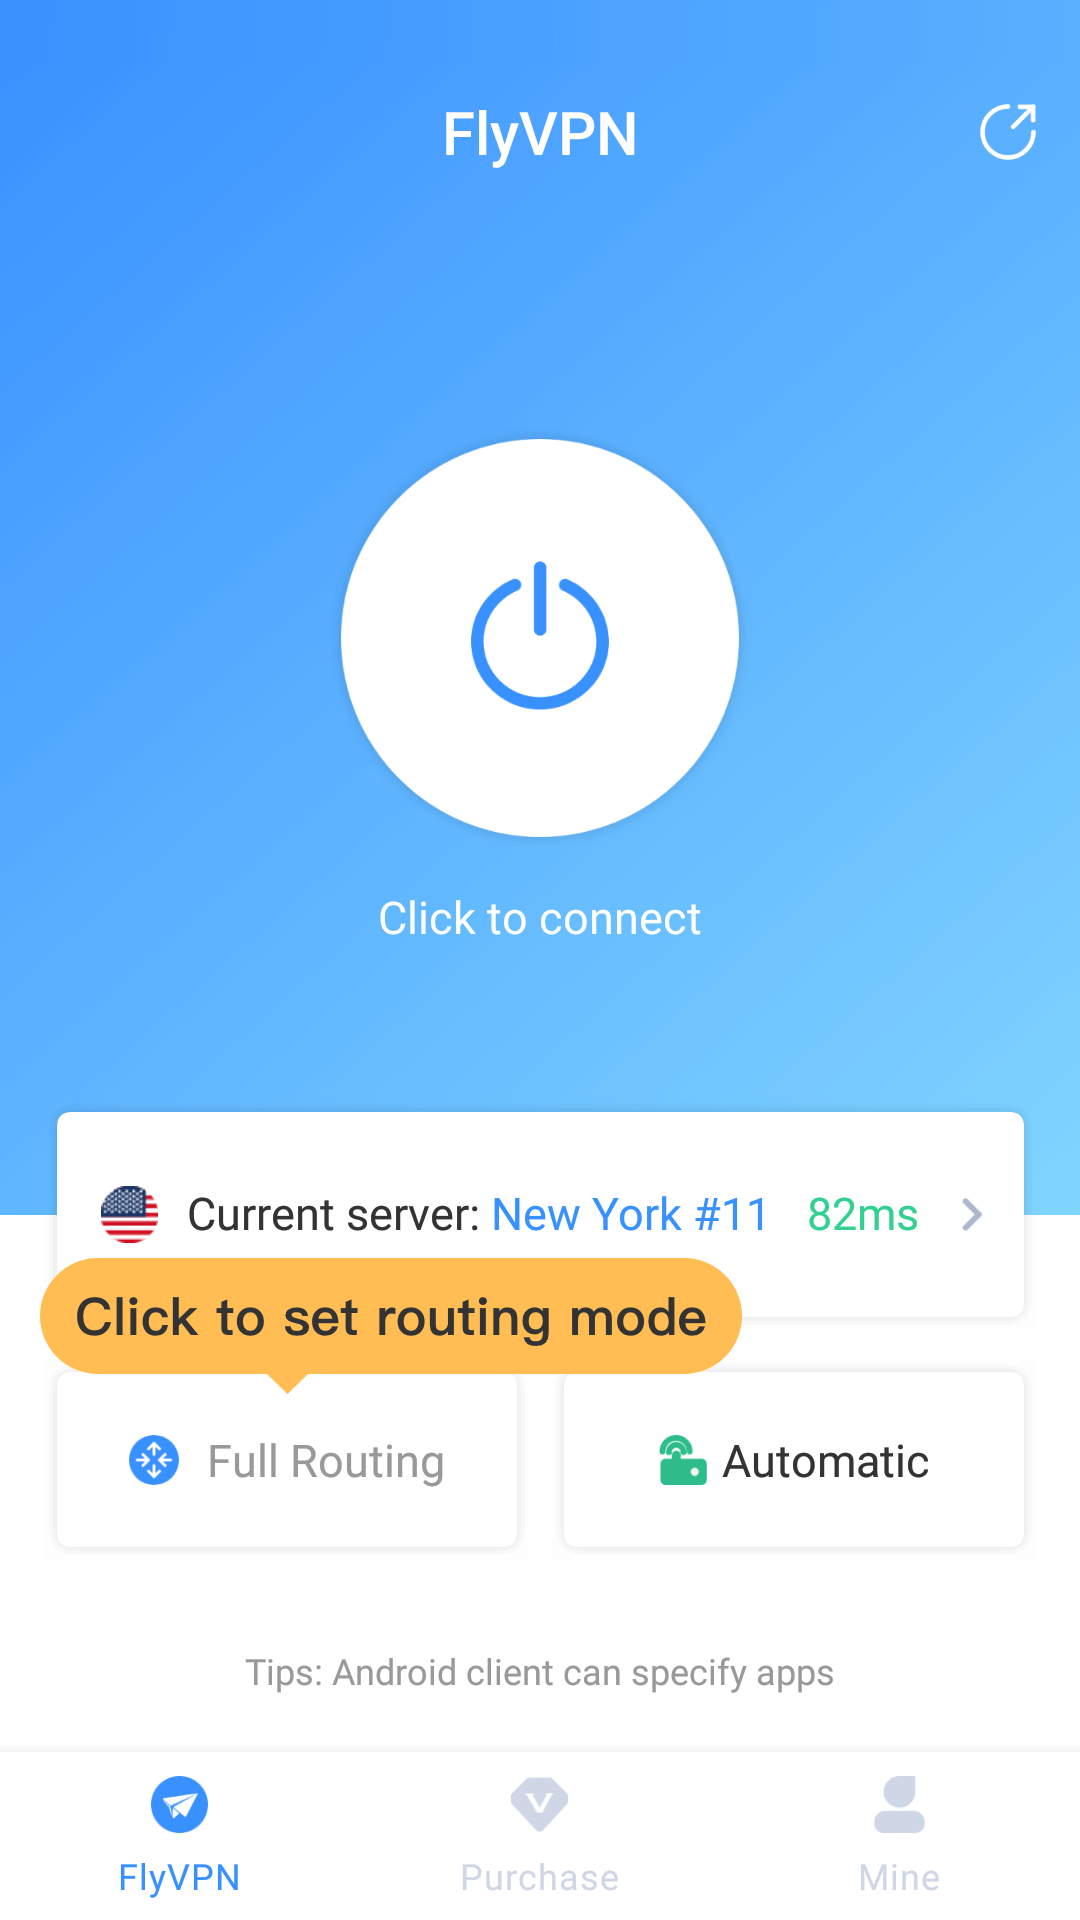
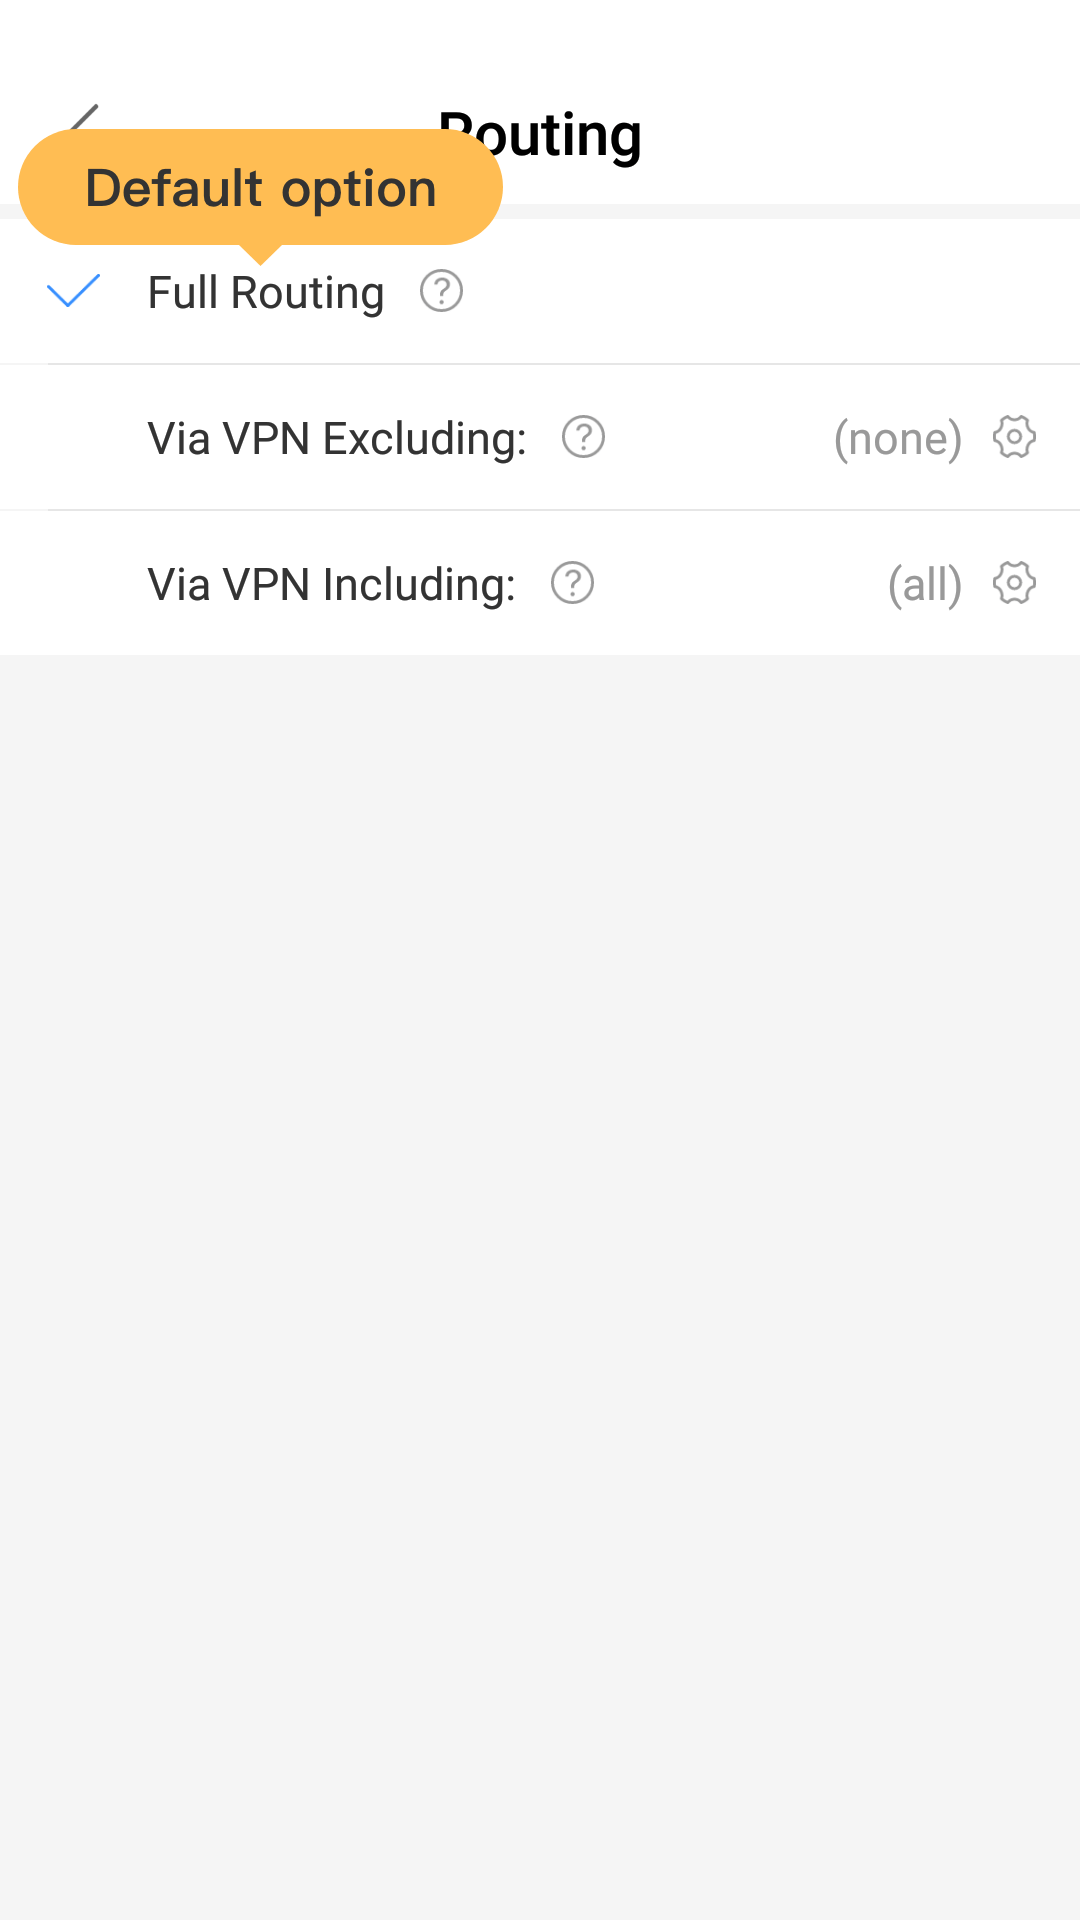
6. Open the "Routing" function, you can set the VPN access mode, the default is full routing mode.
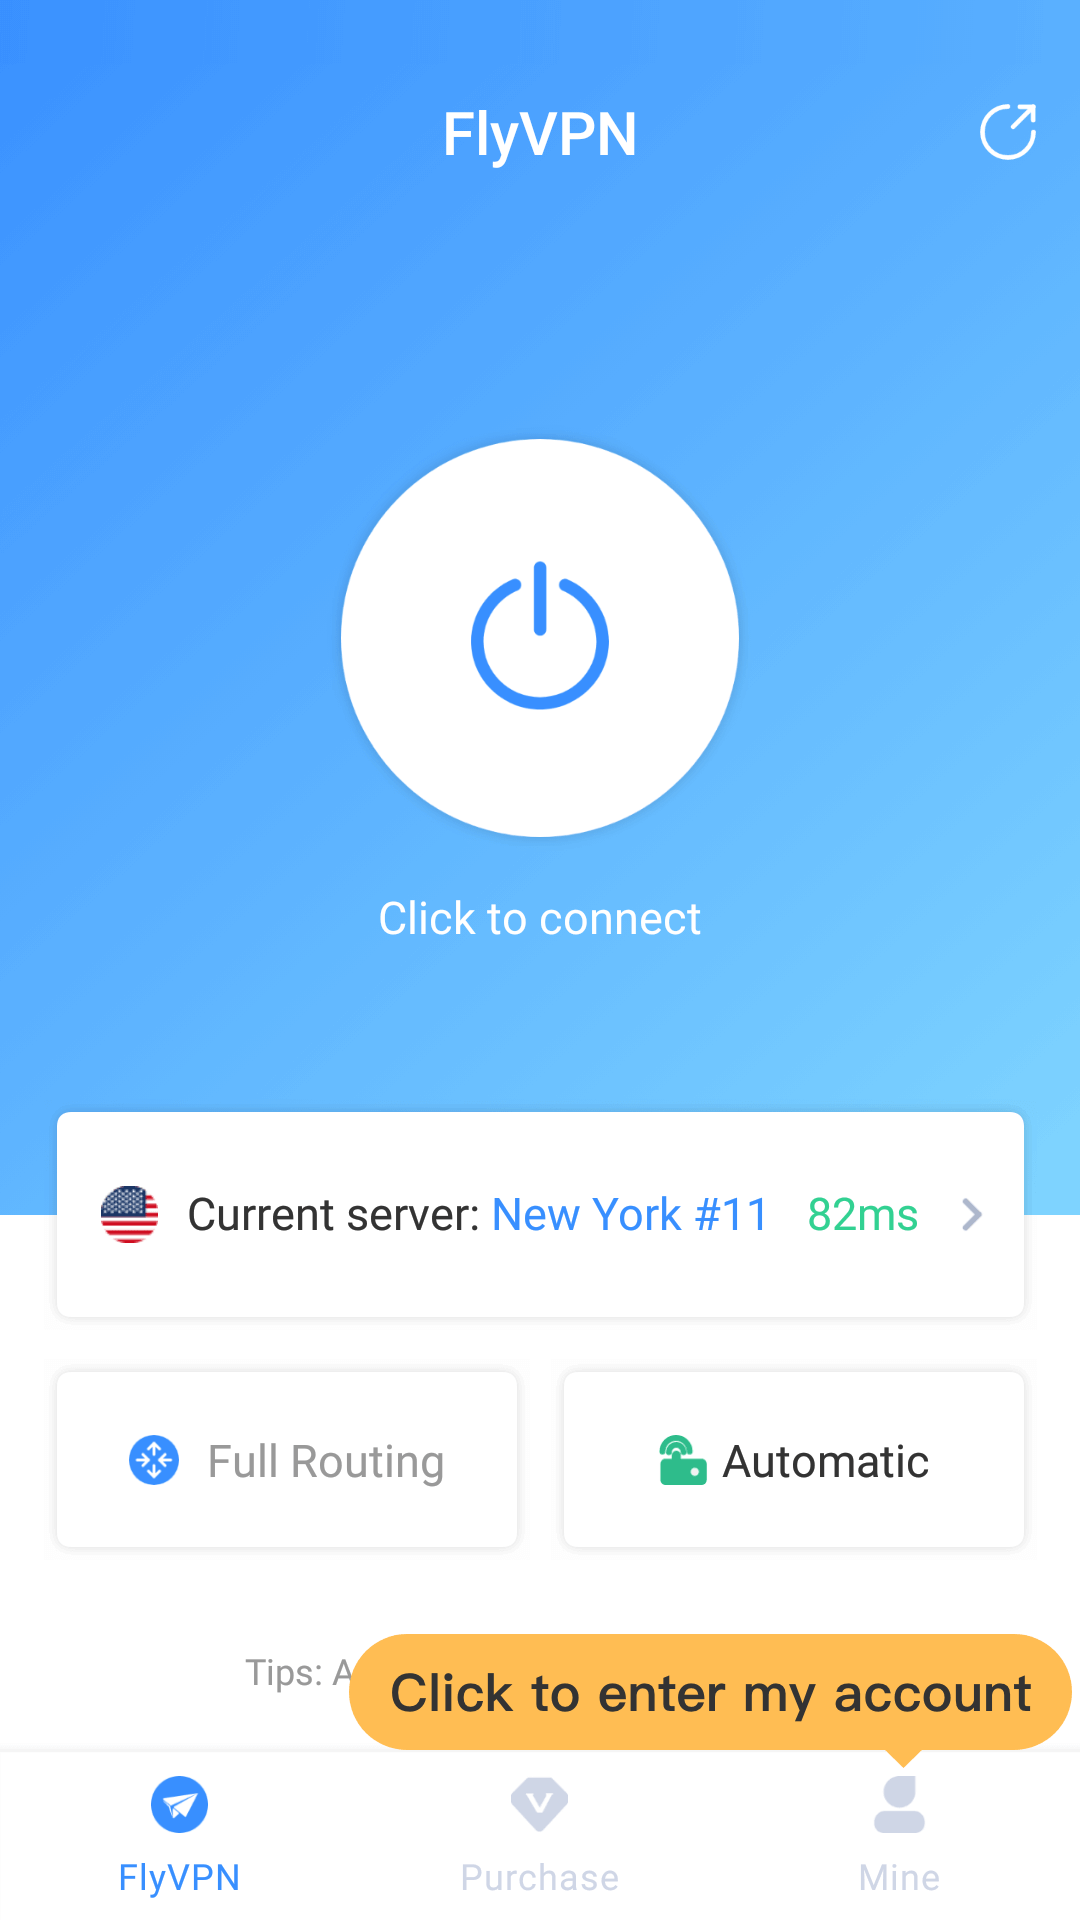
7. The guide of "Home Page","Purchase" and "Mine" are at the bottom of the screen. Click "Mine" to enter the profile page. The modules of the profile include: Billing, Help, Settings, and other functions.
8. Settings include: Reconnect Automatically, Routing, Network Lock, Specify apps and other functions.